Author: ronald
Source: Planet OpenStack
The The Canonical Distribution of Ubuntu OpenStack provides a simple installer to run an OpenStack cloud. You can deploy a simple single machine setup with fully containerized services (11 in total), or a multi server installation leveraging MAAS – Metal as a Service and Landscape Autopilot.
Installation
This post describes my experiences with the single machine setup on a 4 core machine with 32GB of RAM with a clean Ubuntu 14.04 LTS OS. The installation requires the following commands to configure the repo, install and configure your OpenStack cloud.
sudo apt-add-repository -y ppa:cloud-installer/stable
sudo apt-get update
sudo apt-get install -y openstack
sudo openstack-install
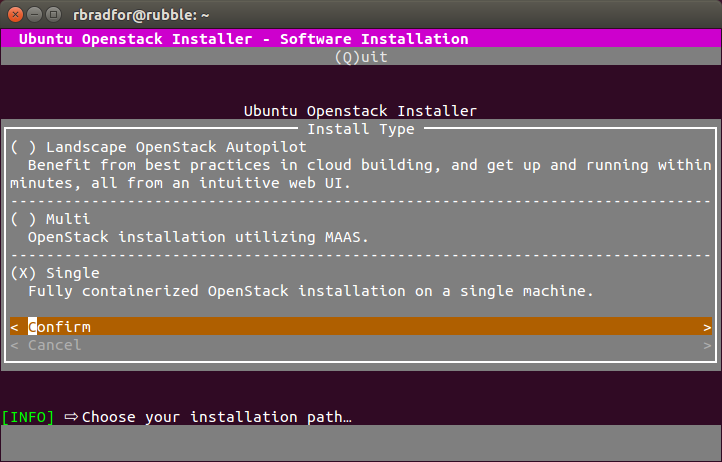
The final step uses a cusors-based interface and only requires two steps before the installation.
- Specify a password
- Specify the install type

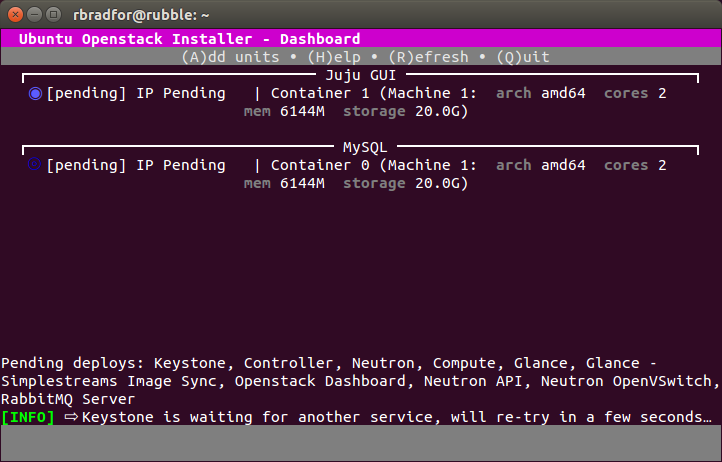
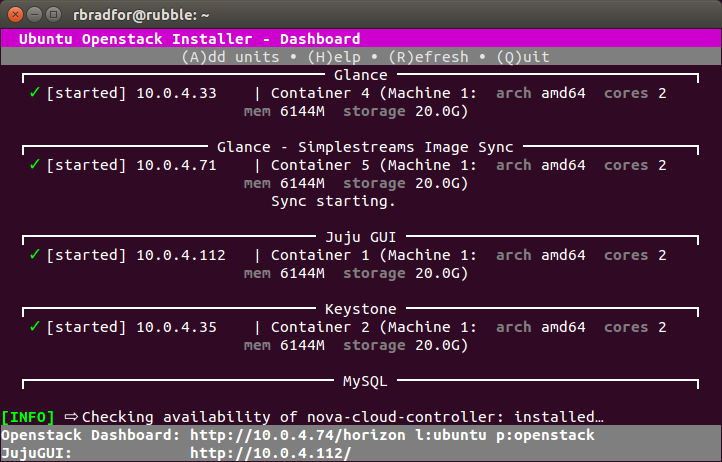
The UI provides a progress status of the installation. Initially new containers will start with a Pending status. Following the starting of the Juju GUI container the footer bar shows the URL for the JujuGUI, in my case http://10.0.4.112. Following the starting of the Openstack Dashboard you will then get a Horizon URL also detailed in the footer such as http://10.0.4.74/horizon.

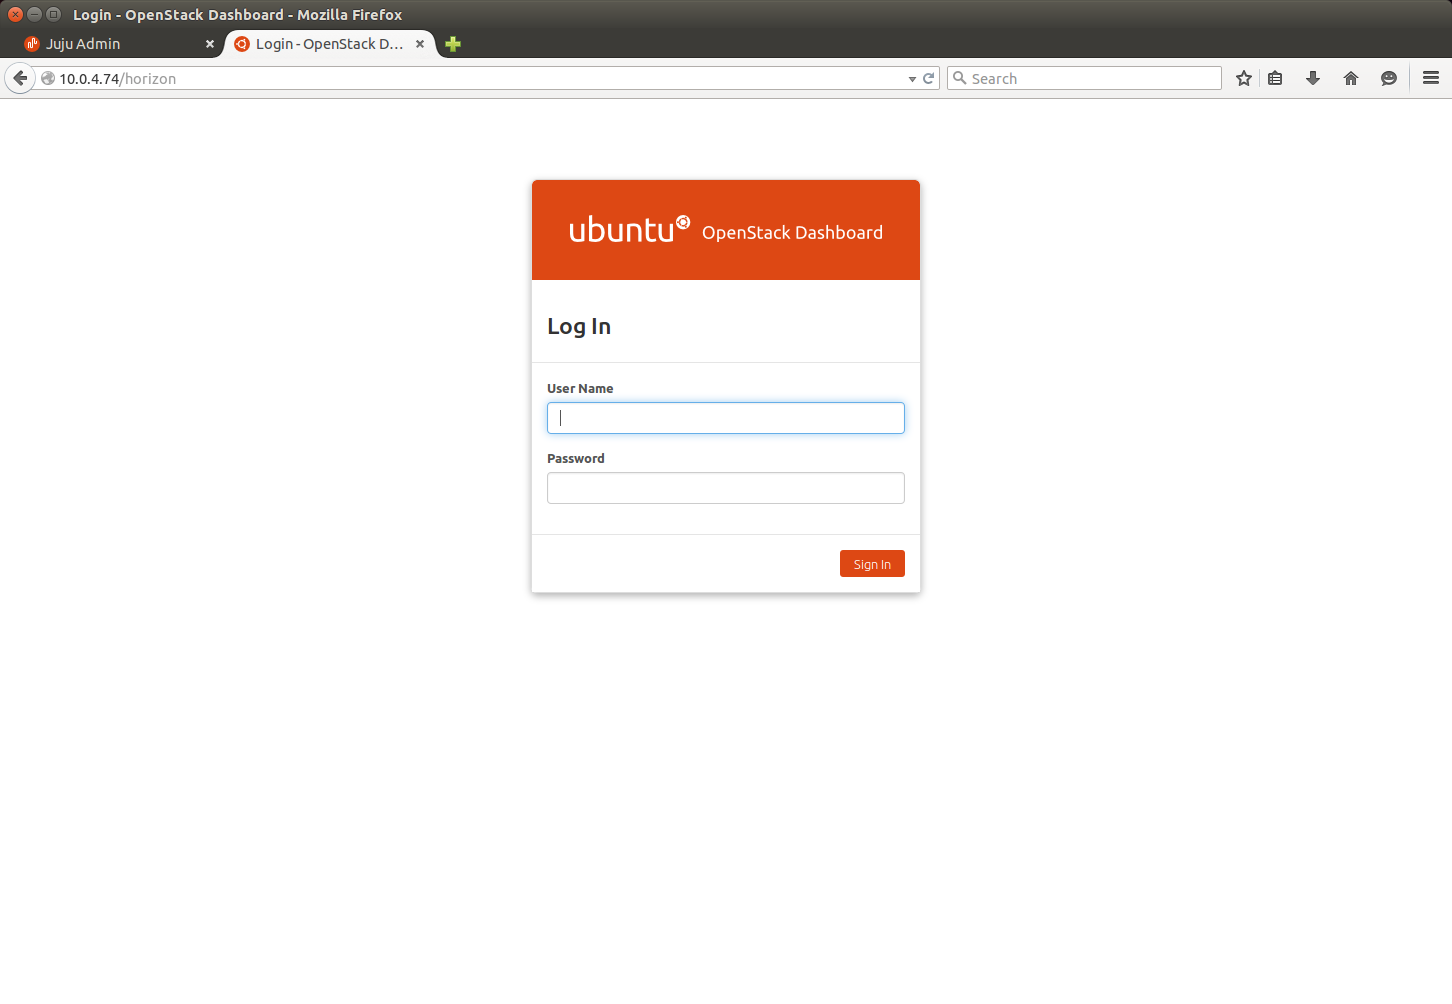
Horizon
The Horizon display is what you generally expect.

JujuGUI
The JujuGUI provides a display of the deployment orchestration via charms. You can also drill down to specific services. An example is for the glance service using the charm cs:trusty/glance-11. This describes the relationships and configuration which are also seen in the GUI. You can also view online the full source code used to create this deployed service.


OpenStack Status
You can view the state of your containerized cloud with openstack-status which is a cursors-based display of the running installation, the same used during the installation. This displays the units deployed, status messages and a footer URL bar that indicates the URL’s of Horizon and JujuGUI. Each time you invoke this it will also check services, as indicated by the [INFO] messages.

Connecting to Containers
The installer will automatically create a SSH key for the user that you use to run the openstack-install command. This enables you to SSH to any of the containers, for example to connect to the MySQL container.
ssh ubuntu@10.0.4.90
$ mysql -uroot -p`sudo cat /var/lib/mysql/mysql.passwd` -e "SHOW SCHEMAS"
+--------------------+
| Database           |
+--------------------+
| information_schema |
| glance             |
| keystone           |
| mysql              |
| neutron            |
| nova               |
| performance_schema |
+--------------------+
You can use the various OpenStack clients to access OpenStack services. These are not installed by default.
sudo apt-get install -y python-glanceclient python-openstackclient python-novaclient python-keystoneclient
$ source $HOME/.cloud-install/openstack-admin-rc
$ glance image-list
+--------------------------------------+---------------------------------------------------------------+-------------+------------------+-----------+--------+
| ID                                   | Name                                                          | Disk Format | Container Format | Size      | Status |
+--------------------------------------+---------------------------------------------------------------+-------------+------------------+-----------+--------+
| f3cd4ec6-8ce6-4a44-85ec-2f8f066f351b | auto-sync/ubuntu-trusty-14.04-amd64-server-20150528-disk1.img | qcow2       | bare             | 257294848 | active |
+--------------------------------------+---------------------------------------------------------------+-------------+------------------+-----------+--------+
More Information
Thanks to the New York OpenStack Group and a presentation by Mark Baker of Canonical who demonstrated MAAS and AutoPilot Automating hard things slides.
Powered by WPeMatico